How Swivel Joints Are Manufactured: From Raw Material to Reliable Industrial Performance
When engineers purchase a swivel joint, they usually compare pressure ratings, connection sizes, seal materials, and pricing. However, one question is rarely asked: How is the swivel joint actually Manufacturing?
From our experience as a swivel joint manufacturer, the answer to this question often determines whether a product will operate reliably for several years or require replacement after only a few months.
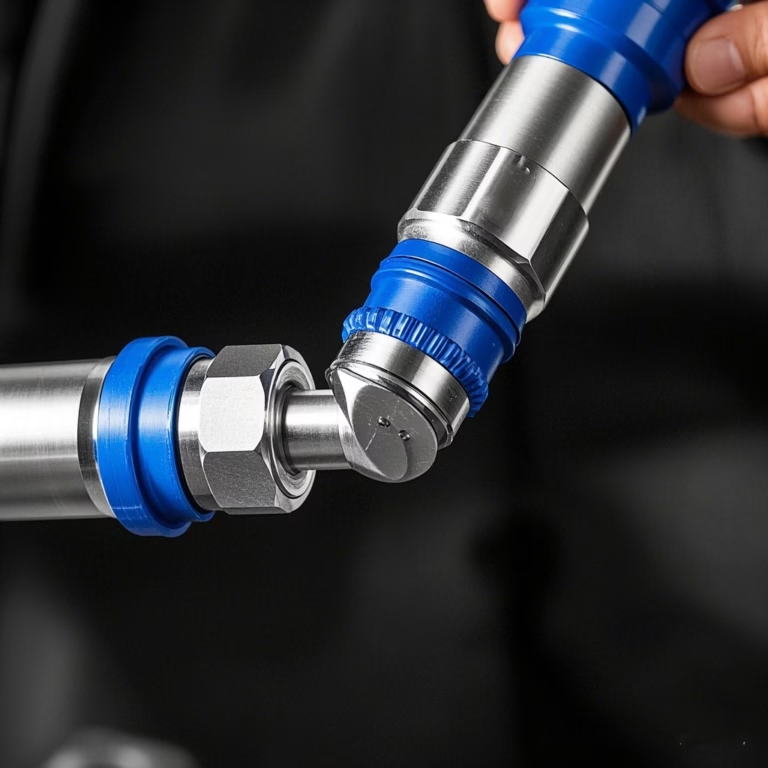
A swivel joint is much more than a machined metal component. It is a precision mechanical assembly that must continuously transfer fluids between stationary piping and rotating equipment while maintaining a reliable seal under pressure, temperature, vibration, and continuous movement.
Every machining tolerance, sealing surface, bearing fit, and inspection procedure influences its final performance.
After manufacturing swivel joints for customers in the steel, paper, hydraulic, marine, construction, mining, chemical, and heavy equipment industries, we have learned that long service life is achieved through hundreds of small engineering decisions made throughout the manufacturing process—not through one single design feature.
In this guide, we share how industrial swivel joints are manufactured in our factory, the production challenges we encounter, the engineering improvements we have introduced over time, and the practical experience we have gained from supplying customers operating under demanding industrial conditions.
Whether you are designing new machinery, replacing an existing swivel joint, or evaluating potential suppliers, understanding the manufacturing process will help you make a more informed decision.
What Is an Industrial Swivel Joint?
A swivel joint is a rotating mechanical connection that allows liquids or gases to flow between stationary and moving components without twisting hoses or pipelines.
Unlike a rotary union, which is typically installed on rotating shafts operating at relatively high speeds, a swivel joint is commonly used where equipment performs limited rotational movement, oscillation, or repeated articulation.
Industrial swivel joints are widely installed on:
- Hydraulic excavators
- Truck-mounted cranes
- Loading arms
- Offshore equipment
- Steel mill cooling systems
- Hydraulic manipulators
- Paper machinery
- Marine equipment
- Construction machinery
- Fire suppression systems
- Oil and gas loading systems
- Industrial hose reels
Depending on the application, swivel joints may transfer:
- Hydraulic oil
- Cooling water
- Hot water
- Steam
- Air
- Nitrogen
- Vacuum
- Lubricating oil
- Process chemicals
Although the operating principle appears simple, designing a swivel joint capable of operating reliably under continuous pressure, vibration, contamination, and changing temperatures requires careful engineering and manufacturing expertise.
Why Manufacturing Quality Matters More Than Product Appearance
Many swivel joints available on the market look nearly identical.
The external dimensions may be the same.
Connection threads may match.
Pressure ratings may even appear identical on specification sheets.
However, products that look similar externally can perform very differently in real industrial environments.
In our factory, we have inspected many failed swivel joints returned from customers. Most failures were not caused by dramatic design defects. Instead, they resulted from small manufacturing issues that gradually developed into major problems during long-term operation.
Common examples include:
- Slightly misaligned seal grooves
- Poor shaft concentricity
- Rough sealing surfaces
- Inconsistent bearing fits
- Incorrect seal compression
- Material selection that did not match the working medium
Each issue may seem insignificant.
Combined over thousands of operating hours, they often determine whether a swivel joint provides reliable service or experiences premature leakage.
This is why manufacturing quality deserves as much attention as product specifications.
Our Engineering Philosophy
At Dann Hydraulic, we believe a swivel joint should be engineered around the customer’s operating conditions—not simply manufactured according to a drawing.
When evaluating a new project, our engineers first study the complete application.
Typical questions include:
- What medium flows through the swivel joint?
- What is the maximum operating pressure?
- Does pressure fluctuate frequently?
- What is the operating temperature?
- Is movement continuous or intermittent?
- Does the equipment operate indoors or outdoors?
- Will the swivel joint be exposed to corrosive chemicals?
- Is maintenance performed regularly?
Only after understanding these operating conditions do we recommend materials, sealing systems, machining methods, and testing procedures.
This application-driven approach has become one of the most valuable lessons we have learned through years of manufacturing industrial swivel joints.
Experience from the Factory Floor
One lesson we learned early in our manufacturing history completely changed the way we approached swivel joint production.
A customer operating hydraulic loading equipment reported recurring seal failures approximately every six months.
Initially, the swivel joint appeared to meet every technical requirement.
The pressure rating was sufficient.
The material specification matched the drawing.
The seal material complied with the application.
Yet failures continued.
Instead of immediately producing another replacement, our engineering team requested additional operating information.
We discovered that the swivel joint experienced frequent pressure spikes during rapid valve switching.
Although the average operating pressure remained within specification, the repeated pressure surges created short-duration peak loads significantly higher than the design condition.
Based on this analysis, we modified several design details:
- Optimized the internal pressure balancing structure.
- Improved seal support geometry.
- Upgraded bearing arrangements.
- Refined machining tolerances around the sealing cavity.
After implementing these improvements, the customer’s maintenance interval increased dramatically.
Projects like this remind us that engineering experience cannot be obtained from drawings alone.
It develops through continuous collaboration with customers, careful failure analysis, and ongoing product improvement.
The Manufacturing Process Begins Long Before CNC Machining
Many people assume swivel joint production starts when a CNC machine begins cutting metal.
In reality, manufacturing begins much earlier.
The first and often most important decision is selecting the appropriate raw material.
Choosing the wrong material may not cause immediate failure, but it often reduces service life under demanding operating conditions.
For example, carbon steel performs well in many hydraulic systems.
However, when equipment operates near seawater or in highly corrosive chemical environments, stainless steel or specially treated alloy materials usually provide significantly better long-term performance.
Likewise, selecting seal materials without considering media compatibility frequently leads to premature leakage.
These lessons have been reinforced repeatedly through years of supporting customers across different industries.
For this reason, material selection is never based solely on price. Instead, we evaluate operating conditions, expected service life, environmental factors, maintenance practices, and customer performance requirements before production begins.
This engineering-first approach lays the foundation for every swivel joint we manufacture and significantly influences the reliability of the finished product.
What You Will Learn in This Guide
The remaining sections of this guide will walk through every major stage of industrial swivel joint manufacturing, including:
- How raw materials are selected
- CNC machining and precision manufacturing
- Heat treatment and surface finishing
- Mechanical seal selection
- Bearing installation
- Assembly procedures
- Pressure and leakage testing
- Quality inspection
- Common manufacturing mistakes
- Practical engineering improvements developed through real customer projects.
- How to select the right swivel joint for different industrial applications
Rather than presenting only theoretical information, we will share practical manufacturing knowledge and engineering experience gained from supplying swivel joints to demanding industries around the world.
Our goal is to help engineers, maintenance professionals, equipment manufacturers, and purchasing teams better understand what distinguishes a high-quality swivel joint from one that simply meets a catalog specification.n
The Complete Swivel Joint Manufacturing Process
Manufacturing a reliable swivel joint is a systematic process rather than a single machining operation. Every stage—from raw material inspection to final pressure testing—affects the product’s sealing performance, pressure resistance, and service life.
At Dann Hydraulic, we have continuously refined our manufacturing process based on customer feedback and real operating conditions. Some improvements were introduced after analyzing returned products, while others resulted from developing custom solutions for demanding applications in steel mills, offshore equipment, hydraulic machinery, and paper production lines.
Below is the manufacturing process we follow to produce industrial swivel joints capable of performing in harsh environments.
Step 1 – Selecting the Right Raw Material
Every swivel joint begins with the selection of suitable raw materials.
This decision is based on the application’s operating conditions rather than simply choosing the least expensive material.
Our engineering team evaluates factors including:
- Working medium
- Operating pressure
- Temperature
- Corrosive environment
- Rotational movement
- Expected service life
- Customer maintenance schedule
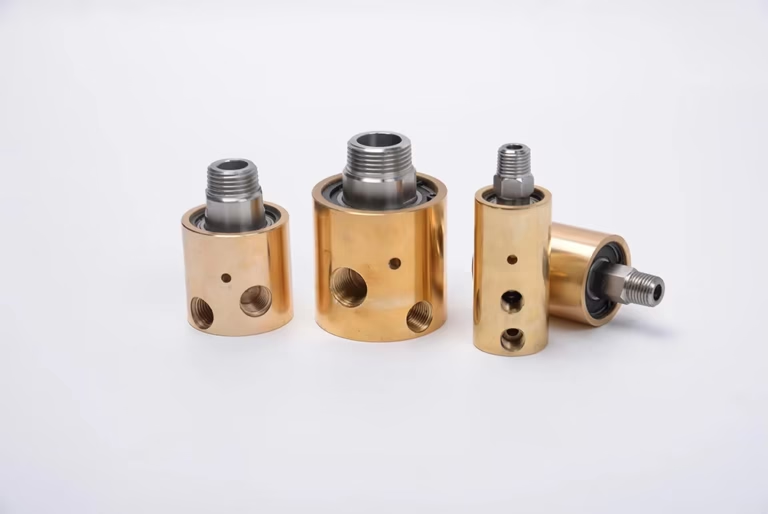
Depending on the application, commonly used materials include:
Carbon Steel
Suitable for:
- General hydraulic systems
- Construction equipment
- Industrial machinery
- Standard cooling water applications
Carbon steel offers excellent strength and cost efficiency but may require additional surface protection in humid environments.
304 Stainless Steel
Recommended for:
- Food processing equipment
- Textile machinery
- General industrial applications
- Equipment exposed to moisture
304 stainless steel provides good corrosion resistance while maintaining excellent machinability.
316 and 316L Stainless Steel
Preferred for:
- Chemical processing
- Offshore equipment
- Marine environments
- Pharmaceutical production
- Food-grade applications
- Chloride-containing media
These materials offer superior corrosion resistance under aggressive operating conditions.
Special Alloy Materials
For applications involving extremely high pressure, elevated temperatures, or abrasive media, special alloy steels or customized materials may be recommended.
Instead of offering a standard material for every project, our engineers evaluate each application individually to ensure the material matches the customer’s operating environment.
Step 2 – Material Inspection Before Production
Raw material quality directly influences machining accuracy and final product reliability.
Before production begins, incoming materials are inspected to verify:
- Material certificates
- Chemical composition
- Surface quality
- Straightness
- External defects
- Dimensional consistency
Only materials meeting our inspection requirements proceed to machining.
This inspection process helps prevent manufacturing problems before production starts rather than discovering defects after assembly.
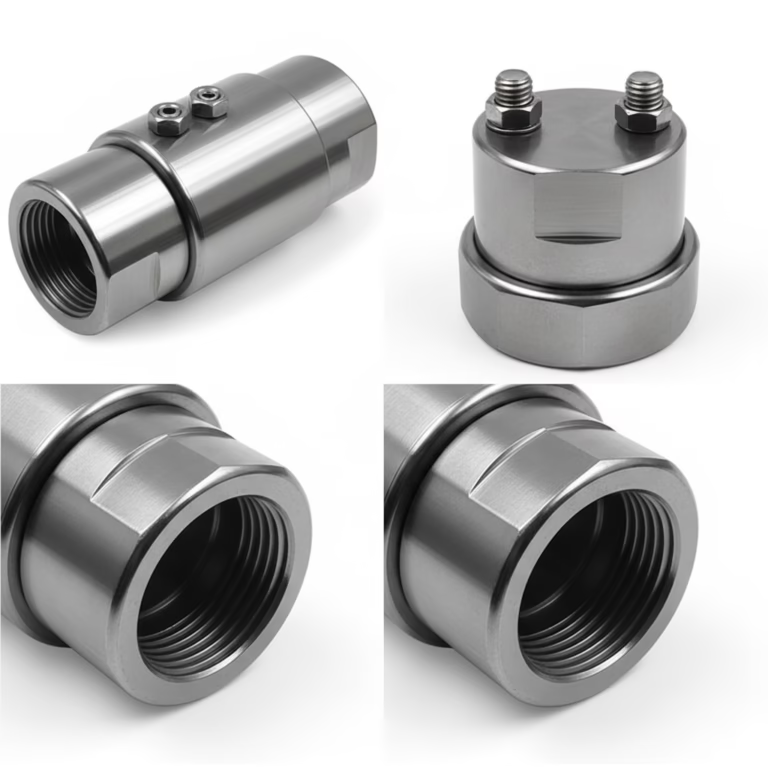
Step 3 – Precision CNC Machining
Once the material has been approved, production moves to CNC machining.
Precision machining is one of the most important stages in swivel joint manufacturing because it determines:
- Seal alignment
- Bearing fit
- Shaft concentricity
- Surface finish
- Thread accuracy
- Dynamic stability
Our production workshop uses CNC lathes and machining centers to manufacture critical components.
Major machining operations include:
- External turning
- Internal boring
- Thread cutting
- Groove machining
- Bearing seat machining
- Seal cavity machining
- Flange processing
Each operation is performed according to engineering drawings and verified through intermediate inspections.
Why Machining Accuracy Matters
Many swivel joint failures can be traced back to machining errors measured in only a few hundredths of a millimeter.
For example:
If the bearing seat is slightly oversized, bearing movement may occur during operation.
If the seal cavity lacks concentricity, uneven loading develops across the sealing faces. The shaft surface finish is too rough; seal wear accelerates significantly.
These seemingly minor deviations become much more significant after thousands of hours of continuous operation.
Over the years, we have invested considerable effort in improving machining consistency because we have seen firsthand how small improvements translate into longer service life for our customers.
Step 4 – Heat Treatment (When Required)
Not every swivel joint requires heat treatment.
However, applications involving:
- High pressure
- Heavy mechanical loading
- Abrasive environments
- Continuous operation may require additional hardness to improve wear resistance.
Depending on customer requirements, components may undergo:
- Hardening
- Tempering
- Surface hardening
- Stress relief
Proper heat treatment improves mechanical strength while maintaining dimensional stability during subsequent machining.
Step 5 – Precision Grinding and Surface Finishing
After machining, critical sealing surfaces often undergo precision grinding.
This process improves:
- Flatness
- Surface finish
- Contact accuracy
- Seal stability
Mechanical seals rely on smooth, precisely matched sealing faces.
Even slight imperfections can increase leakage or accelerate wear.
Our technicians inspect sealing surfaces carefully before assembly to ensure they meet the required quality standards.
Step 6 – Mechanical Seal Selection
One of the most common mistakes in swivel joint selection is assuming that one seal material is suitable for every application.
In reality, seal performance depends heavily on operating conditions.
When selecting sealing materials, our engineers consider:
- Medium compatibility
- Pressure
- Temperature
- Rotational movement
- Chemical resistance
- Lubrication conditions
Typical seal face combinations include:
- Carbon Graphite + Silicon Carbide
- Silicon Carbide + Silicon Carbide
- Tungsten Carbide + Carbon Graphite
Elastomer materials are also selected according to media compatibility.
Choosing the proper seal combination often extends service life more effectively than simply increasing pressure ratings.
Engineering Experience: A Lesson Learned from Seal Selection
Several years ago, a customer using swivel joints on chemical transfer equipment contacted us regarding repeated seal failures.
The pressure and temperature remained within the design limits, making the failures difficult to explain.
After reviewing the complete operating process, we discovered that the issue occurred during equipment cleaning rather than normal production.
The cleaning solution gradually degraded the original elastomer material, eventually causing leakage.
Our engineers recommended changing both the seal material and elastomer specification while maintaining the existing mechanical design.
Following this modification, maintenance intervals increased significantly without requiring changes to the customer’s equipment.
Experiences like this remind us that successful engineering depends on understanding the complete operating process rather than focusing only on pressure and temperature.
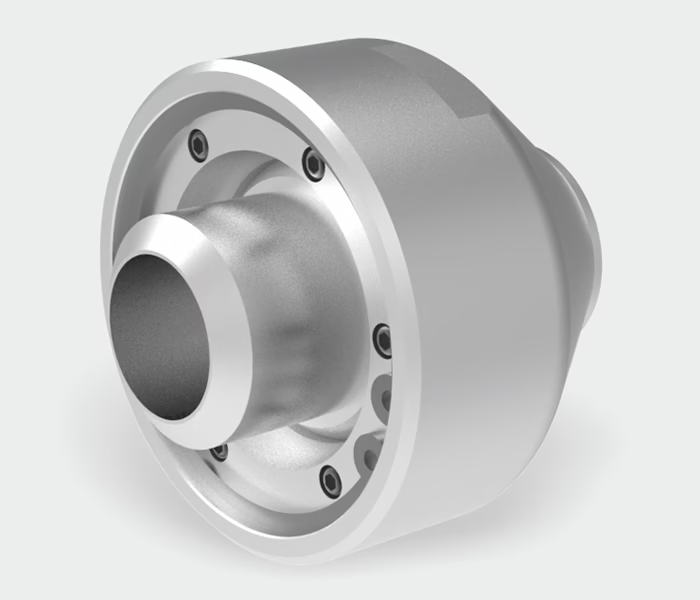
Step 7 – Bearing Installation
Bearings support the rotating components while maintaining smooth movement.
Improper bearing installation can lead to:
- Vibration
- Excessive friction
- Heat generation
- Premature seal failure
Before installation, technicians inspect:
- Bearing dimensions
- Bearing seats
- Shaft fits
- Housing alignment
Each bearing is installed using controlled assembly procedures to prevent unnecessary preload or damage.
Maintaining correct bearing alignment helps improve both rotational stability and seal life.
Step 8 – Precision Assembly
Assembly is more than fitting components together.
It requires careful attention to cleanliness, dimensional accuracy, and installation sequence.
Before assembly begins:
- Components are cleaned thoroughly.
- Sealing surfaces are inspected.
- O-rings are checked for damage.
- Bearings are verified.
- Springs are measured.
Technicians then assemble the swivel joint according to standardized procedures developed through years of manufacturing experience.
Throughout assembly, every rotating component is checked to ensure smooth movement without abnormal resistance.
Step 9 – Pressure Testing and Leakage Inspection
Testing is one of the final and most important stages of production.
Rather than assuming every assembled product performs correctly, we verify its sealing performance before shipment.
Depending on the application, testing may include:
- Hydrostatic pressure testing
- Pneumatic leakage testing
- Rotation testing
- Functional verification
- Connection inspection
Pressure testing helps identify potential sealing issues before products leave the factory, reducing the likelihood of installation problems at the customer’s site.
Step 10 – Final Inspection Before Shipment
Before packaging, every swivel joint undergoes a final quality inspection.
Inspection items typically include:
- Product dimensions
- Surface finish
- Thread accuracy
- Rotation smoothness
- Marking verification
- Appearance inspection
- Packaging confirmation
Only products that complete all required inspections proceed to shipment.
For us, final inspection is not the end of manufacturing—it is the final confirmation that every previous production stage has been completed correctly.
This attention to detail reflects our belief that long-term reliability is achieved through disciplined manufacturing practices rather than relying on a single inspection at the end of production.
Engineering Experience: What Years of Manufacturing Have Taught Us
Manufacturing swivel joints is not simply a matter of following engineering drawings. Every production batch, customer project, and field inspection provides new information that helps improve future designs.
Over the years, our engineering team has reviewed returned products from customers in steel mills, paper plants, offshore platforms, construction equipment, hydraulic systems, and chemical processing facilities. While every application is different, many of the lessons are remarkably consistent.
We have learned that the service life of a swivel joint depends just as much on understanding the customer’s operating conditions as it does on machining precision.
For this reason, our product development process never stops after a new model enters production. Every customer project becomes part of our continuous improvement program.
Case Study 1: A Seal Problem That Wasn’t Actually a Seal Problem
A customer operating a hydraulic loading arm contacted us because the swivel joint was leaking after only eight months of service.
Their maintenance team believed the mechanical seal had failed.
They requested replacement seal kits.
Instead of shipping replacement parts immediately, our engineers asked for additional information, including:
- Operating pressure
- Hydraulic circuit layout
- Installation photos
- Hose routing
- Equipment movement
- Maintenance records
After reviewing the application, we noticed that the hoses connected to the swivel joint were under continuous side loading.
Every movement of the loading arm transferred additional force directly into the swivel joint housing.
The mechanical seal itself was functioning correctly.
The real problem was continuous shaft deflection caused by external pipe stress.
Working together with the customer, we modified the hose routing and recommended additional pipe support.
The leakage problem disappeared without changing the seal design.
That project reinforced an important engineering principle:
A swivel joint should always be evaluated as part of the complete hydraulic system—not as an isolated component.
Case Study 2: Corrosion in a Coastal Environment
Another customer used swivel joints on mobile equipment operating near a seaport.
The original carbon steel units required replacement approximately every year because external corrosion gradually damaged the housing and fasteners.
Rather than simply supplying another carbon steel replacement, our engineers visited the application data and reviewed the operating environment.
The equipment was exposed to:
- Salt spray
- High humidity
- Frequent rainfall
- Outdoor storage
We recommended upgrading the housing to 316 stainless steel while also changing several external components to corrosion-resistant materials.
Although the initial purchase cost increased slightly, the customer reported substantially longer service life and lower maintenance costs over the following years.
This project demonstrated that selecting materials according to the operating environment often provides greater long-term value than choosing the lowest initial purchase price.
Case Study 3: Continuous Operation in a Steel Mill
Steel production equipment often operates continuously under demanding conditions.
One customer experienced repeated bearing failures on swivel joints installed in a cooling water system.
The bearings were replaced several times, yet the failures continued.
Our engineering team requested the failed components for inspection.
After disassembly, we observed unusual wear patterns that suggested vibration rather than lubrication failure.
Further investigation revealed slight shaft misalignment caused by wear elsewhere in the equipment.
Once the shaft alignment was corrected, bearing life improved significantly.
This experience reminded us that replacing components without identifying the underlying cause rarely solves long-term reliability issues.
How Customer Feedback Improves Our Products
Every returned swivel joint tells a story.
Some products return because of normal wear after years of service.
Others return because customers want upgraded designs for higher pressures or more demanding applications.
Rather than viewing returned products as failures, we see them as opportunities to improve future designs.
Our engineering team regularly analyzes:
- Mechanical seal wear
- Bearing condition
- Housing deformation
- Surface corrosion
- Shaft wear
- O-ring performance
- Internal flow patterns
- Installation marks
These observations help us refine:
- Seal geometry
- Bearing arrangements
- Material selection
- Surface finishing
- Internal pressure balancing
- Machining tolerances
Continuous product improvement has become an essential part of our manufacturing philosophy.
Common Manufacturing Mistakes We Often See
Through reverse engineering and inspection of swivel joints from various sources, we have identified several manufacturing issues that frequently shorten product life.
Poor Surface Finish
Mechanical seals require extremely smooth sealing surfaces.
If the surface finish is inconsistent, friction increases and seal wear accelerates.
For this reason, we carefully control the machining and finishing of critical sealing areas before assembly.
Incorrect Bearing Fits
Bearing installation requires precise dimensional control.
A bearing seat that is too tight may generate excessive heat.
A bearing seat that is too loose may allow movement during operation.
Both situations reduce bearing life and eventually affect sealing performance.
Inappropriate Material Selection
One material cannot satisfy every application.
For example:
- Carbon steel performs well in many hydraulic systems.
- Stainless steel provides superior corrosion resistance.
- Hardened alloy materials perform better under heavy mechanical loading.
Selecting materials based only on purchase price often increases long-term operating costs.
Ignoring the Operating Environment
Many swivel joints are selected according to pressure and connection size while overlooking environmental conditions.
Factors such as:
- Dust
- Saltwater
- Chemicals
- Outdoor exposure
- High humidity
- Abrasive particles
Can significantly influence service life.
Our engineers always evaluate these factors before recommending a product configuration.
Failure Analysis: Why Swivel Joints Leak
Customers often ask a simple question:
“Why did my swivel joint start leaking?”
The answer is rarely simple.
In our experience, leakage usually results from several contributing factors rather than a single defect.
Common causes include:
Mechanical Seal Wear
Normal wear eventually occurs after long operating periods.
Proper maintenance helps extend seal life.
Shaft Misalignment
Misalignment increases uneven loading on sealing surfaces.
Even small alignment errors gradually accelerate seal wear.
Excessive Pressure Peaks
Average operating pressure may appear acceptable while short-duration pressure spikes overload the sealing system.
Pressure monitoring often reveals problems that are not visible during normal inspections.
Contaminated Working Media
Metal particles, abrasive contaminants, and scale may damage sealing surfaces.
Proper filtration significantly improves service life.
Improper Installation
Installation errors remain one of the leading causes of premature swivel joint failure.
Our engineers recommend following installation procedures carefully and avoiding excessive external pipe loads.
How We Continue Improving Our Manufacturing Process
Manufacturing technology continues to evolve, and so do customer expectations.
To remain competitive, we continually invest in improving both our products and our production processes.
Recent improvements include:
- Higher-precision CNC machining
- Improved concentricity control
- Enhanced inspection procedures
- Optimized seal cavity machining
- Better pressure testing methods
- Refined assembly procedures
- Improved material traceability
These improvements may appear minor individually.
Collectively, they contribute to greater consistency and longer product life across every production batch.
Looking Beyond Drawings
One of the biggest differences between manufacturing and engineering is perspective.
A drawing specifies dimensions.
Real operating conditions introduce vibration, contamination, temperature fluctuations, pressure cycles, corrosion, maintenance practices, and installation challenges that cannot always be fully represented on paper.
This is why we believe successful swivel joint manufacturing requires continuous communication between engineers, production technicians, quality inspectors, and customers.
Every project provides a new experience. Every field application teaches valuable lessons. Improvement strengthens the next generation of products.
For us, manufacturing is not simply producing components—it is an ongoing engineering process driven by practical industrial experience and a commitment to helping customers achieve safer, more reliable, and more efficient equipment operation.
How to Select the Right Swivel Joint
Selecting a swivel joint is not simply a matter of matching thread sizes or pressure ratings. A swivel joint that performs well in one application may fail prematurely in another if the operating conditions are different.
When our engineers evaluate a new project, we consider the complete operating environment before recommending a solution.
1. Working Medium
The type of media passing through the swivel joint determines both material compatibility and seal selection.
Common media include:
- Hydraulic oil
- Cooling water
- Hot water
- Steam
- Thermal oil
- Compressed air
- Nitrogen
- Vacuum
- Grease
- Chemical fluids
Selecting the wrong seal material may result in swelling, hardening, or accelerated wear, even if the pressure and temperature remain within specification.
2. Operating Pressure
Pressure affects sealing performance, housing strength, and bearing loading.
Instead of selecting the highest available pressure rating, choose a swivel joint designed for the actual operating pressure, including any pressure fluctuations or shock loads.
For hydraulic systems with frequent pressure spikes, additional safety margins are often recommended.
3. Operating Temperature
Temperature has a direct impact on:
- Seal material life
- Lubrication performance
- Bearing stability
- Material expansion
Applications involving high-temperature steam or thermal oil require different sealing systems than those handling cooling water or compressed air.
4. Rotation Angle and Movement
Unlike high-speed rotary unions, many swivel joints operate with limited rotation or oscillating movement.
Examples include:
- 90°
- 180°
- 360°
- Continuous slow rotation
Understanding the actual movement helps determine the most suitable bearing arrangement and sealing design.
5. Installation Environment
The surrounding environment often has a greater impact on service life than pressure alone.
Factors to consider include:
- Outdoor exposure
- Dust and abrasive particles
- Salt spray
- High humidity
- Chemical vapors
- Frequent washdowns
Matching the swivel joint to these conditions significantly improves long-term reliability.
Typical Industrial Applications
Our swivel joints are used across a wide range of industries where reliable fluid transfer and long service life are essential.
Construction Machinery
Applications include:
- Excavators
- Cranes
- Concrete pumps
- Rotary drilling equipment
- Aerial work platforms
Swivel joints prevent hose twisting while allowing smooth movement of hydraulic systems.
Steel Industry
Steel production equipment operates under demanding conditions involving high temperatures, cooling water, hydraulic systems, and continuous operation.
Typical installations include:
- Continuous casting equipment
- Cooling lines
- Rolling mills
- Coil handling equipment
Reliable swivel joints help minimize downtime and improve production efficiency.
Paper Mills
Paper manufacturing requires continuous transfer of steam, condensate, cooling water, and hydraulic fluids.
Swivel joints are commonly installed on:
- Reel handling systems
- Hydraulic positioning equipment
- Coating machines
- Roll changing equipment
Stable sealing performance helps reduce maintenance while supporting continuous production.
Marine and Offshore Equipment
Marine equipment is exposed to one of the harshest operating environments.
Our swivel joints are used on:
- Loading arms
- Offshore cranes
- Deck machinery
- Winches
- Hose reels
- Shipboard hydraulic systems
Corrosion-resistant materials such as 316 stainless steel significantly improve service life in saltwater environments.
Oil and Gas Industry
Loading systems, articulated arms, and transfer equipment require dependable swivel joints capable of handling pressure fluctuations and demanding operating conditions.
Proper material selection and sealing technology are critical for maintaining safety and preventing leakage.
Mining Equipment
Mining machinery operates under severe conditions involving:
- Dust
- Abrasive particles
- Heavy vibration
- Continuous movement
Our engineers often recommend reinforced bearing arrangements and wear-resistant materials for these demanding applications.
Maintenance Best Practices
Routine maintenance plays a major role in extending swivel joint service life.
Based on years of field support, we recommend the following practices.
Perform Regular Inspections
Inspect the swivel joint for:
- Leakage
- Corrosion
- Loose fittings
- Damaged hoses
- Abnormal vibration
Early detection often prevents costly failures.
Maintain Proper Alignment
Pipe stress and incorrect installation are common causes of premature seal wear.
Ensure that connected piping is properly supported and does not apply unnecessary force to the swivel joint.
Keep Hydraulic Systems Clean
Contaminated hydraulic oil can damage bearings and seals.
Use appropriate filtration and replace hydraulic fluid according to the equipment manufacturer’s maintenance schedule.
Replace Wear Components During Scheduled Maintenance
Mechanical seals, O-rings, and bearings are consumable components.
Replacing these parts during planned shutdowns reduces the risk of unexpected equipment failure.
Record Operating Conditions
Monitoring:
- Pressure
- Temperature
- Maintenance intervals
- Failure history
helps identify trends and supports more effective predictive maintenance programs.
Frequently Asked Questions
1. What is the difference between a swivel joint and a rotary union?
A swivel joint is primarily designed for oscillating or limited rotational movement, while a rotary union is typically used on continuously rotating shafts operating at higher speeds. The choice depends on the equipment design and operating requirements.
2. Which industries use swivel joints?
Swivel joints are widely used in hydraulic equipment, construction machinery, steel plants, paper mills, marine engineering, mining, chemical processing, oil and gas, agriculture, and industrial automation.
3. Can you manufacture custom swivel joints?
Yes. We provide OEM and custom manufacturing services based on customer drawings, operating conditions, connection types, and installation requirements.
4. Which materials are available?
Depending on the application, we manufacture swivel joints using:
- Carbon steel
- 304 stainless steel
- 316 stainless steel
- 316L stainless steel
- Alloy steel
Material recommendations are based on operating conditions rather than standard configurations.
5. What media can your swivel joints handle?
Our products are suitable for:
- Hydraulic oil
- Water
- Steam
- Thermal oil
- Compressed air
- Vacuum
- Nitrogen
- Grease
- Various industrial fluids
6. How do I know which seal material is suitable?
Seal selection depends on the working medium, temperature, pressure, and chemical compatibility. Our engineering team reviews these parameters before recommending the most appropriate seal combination.
7. Can your products replace imported swivel joints?
Yes. We manufacture compatible replacement solutions for many internationally recognized swivel joint brands. Our engineers can recommend a suitable replacement based on drawings, dimensions, photographs, or part numbers.
8. How long does a swivel joint typically last?
Service life depends on application conditions, installation quality, maintenance practices, and operating environment. Correct product selection and preventive maintenance significantly extend operational life.
9. Do you provide engineering support?
Yes. We assist customers with product selection, technical drawings, installation guidance, troubleshooting, and OEM development throughout the project lifecycle.
10. How is every swivel joint tested?
Before shipment, products may undergo dimensional inspection, rotation checks, hydrostatic pressure testing, pneumatic leakage testing, and final visual inspection to verify quality and performance.
11. What information is required for a quotation?
To recommend the most suitable swivel joint, we typically need:
- Working medium
- Operating pressure
- Temperature
- Rotation angle
- Connection type
- Installation space
- Equipment model
- Quantity required
12. Why choose Dann Hydraulic as your swivel joint manufacturer?
Because we combine manufacturing capability with practical engineering experience. We control CNC machining, assembly, testing, and quality inspection in-house, enabling us to provide customized solutions, consistent product quality, and responsive technical support. Our objective is not simply to supply a swivel joint, but to help customers improve equipment reliability, reduce maintenance costs, and maximize long-term operating performance.
Why Customers Choose Dann Hydraulic
Industrial customers around the world choose Dann Hydraulic because they need more than a component supplier—they need a manufacturing partner that understands real operating conditions.
Our strengths include:
- In-house CNC machining and precision manufacturing
- Experienced engineering team with application-focused support
- Custom swivel joint design and OEM production
- Strict inspection and pressure testing procedures
- Flexible material and seal selection
- Reverse engineering for replacement of imported swivel joints
- Stable production capacity and global export experience
- Continuous product improvement based on customer feedback
Every swivel joint we manufacture reflects years of practical engineering experience gained from supporting customers across diverse industries. From raw material selection to final testing, every production stage is designed to deliver reliable performance, long service life, and consistent quality.
Conclusion
A high-quality swivel joint is not created by machining alone. It is the result of careful engineering, appropriate material selection, precision manufacturing, rigorous quality control, and continuous improvement based on real industrial applications.
Throughout this guide, we have shared the manufacturing process we use, the lessons we have learned from customer projects, and the engineering decisions that influence long-term reliability. These experiences have shaped the way we design and manufacture swivel joints today.
Whether your application involves construction machinery, hydraulic systems, steel production, paper manufacturing, marine equipment, mining, or chemical processing, selecting the right manufacturing partner is just as important as selecting the right product.
At Dann Hydraulic, we are committed to providing dependable swivel joint solutions that help customers improve equipment reliability, reduce maintenance costs, and increase operational efficiency. If you are looking for a standard swivel joint, a customized OEM solution, or a cost-effective replacement for an imported model, our engineering team is ready to support your project with practical expertise and reliable manufacturing capabilities.
Contact us today to discuss your application, review your technical requirements, or request a customized quotation. We look forward to helping you build more reliable fluid transfer systems with high-performance swivel joints designed for demanding industrial environments.