Is Your Installation Killing Your Rotary Joints? 5 Common Mistakes to Avoid Meta
Introduction: The Hidden Cost of Bad Installation
You’ve invested in a high-performance hydraulic rotary union. You’ve waited for the lead time and installed it. Yet, within a week, you see that dreaded drip of hydraulic oil or feel excessive heat coming from the housing. Rotary Union Installation is very important.
Is the part defective? In our 10+ years of analyzing returned units, we have found that over 70% of “premature failures” are not product defects—they are installation errors.
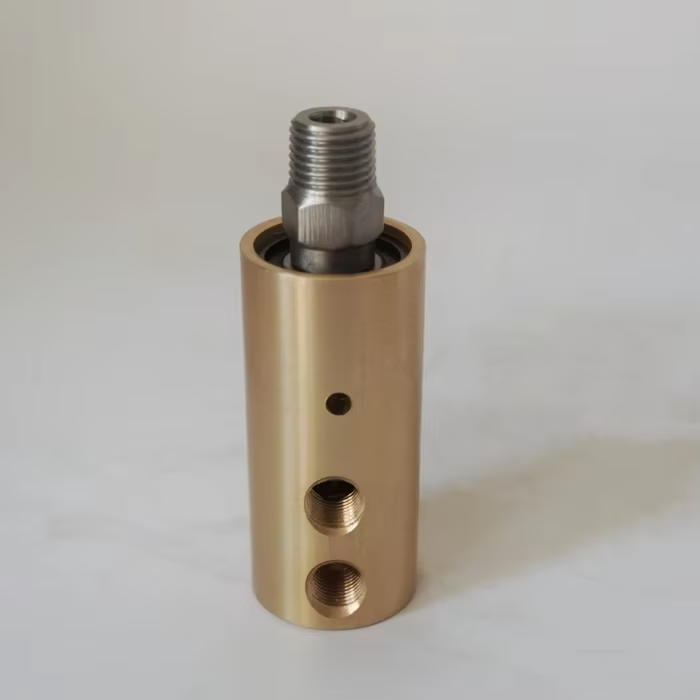
A rotary union (or swivel joint) is a precision instrument. Inside its rugged metal housing lies a delicate ecosystem of micro-lapped mechanical seals and precision bearings. Treat it like a pipe fitting, and it will fail like a pipe fitting. Treat it like a precision component, and it will run for years.
This guide targets maintenance engineers and technicians. We will strip away the jargon and look at the physics of rotary union installation, focusing on the five most common mistakes that kill rotary joints—and specifically, why the industry-standard practice of “hard piping” is the enemy of reliability.
Why Proper Rotary Union Installation Is Critical
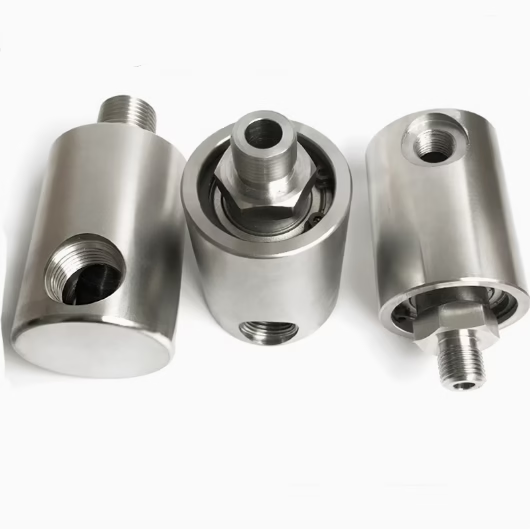
A rotary union is not a structural component. It is a precision sealing device consisting of:
-
Mechanical seals or lip seals
-
Precision bearings
-
A rotating shaft and a stationary housing
Its primary function is to maintain sealing integrity while allowing continuous rotation.
When installation errors occur:
-
Pipe stress
-
Axial or radial loads
-
Thermal expansion forces
-
Vibration or shock
These forces directly load the internal seals and bearings, drastically reducing service life.
Correct installation isolates the rotary union from external stress. Incorrect installation accelerates failure.
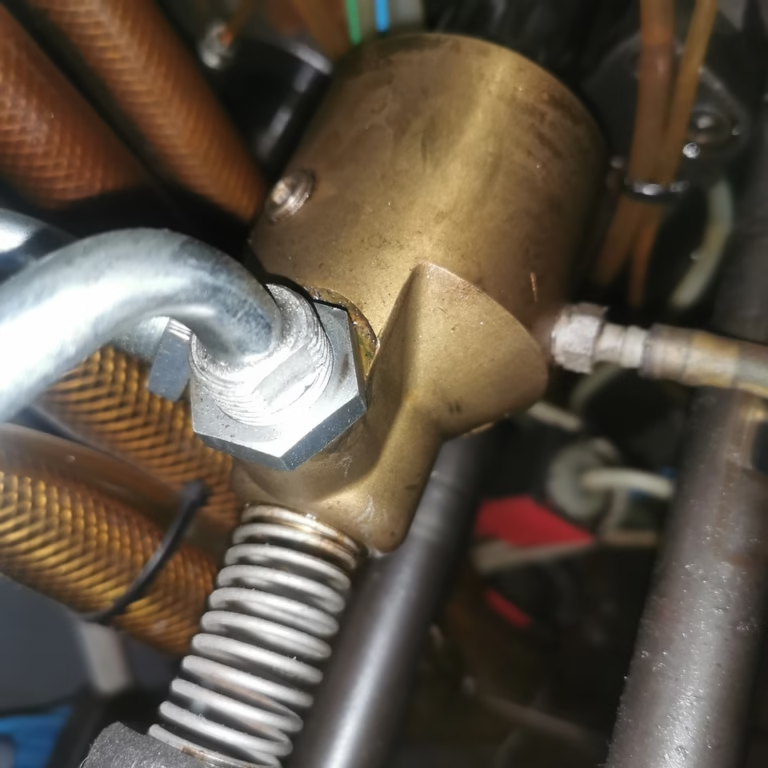
Mistake #1: The “Hard Piping” Trap (The #1 Killer of Seals)
If you take only one thing away from this article, let it be this: Never connect a rotary union directly to a rigid pipe. In many installations, rotary unions are connected directly to rigid steel pipes, stainless steel pipes, or copper tubing. While this may appear strong and tidy, it is fundamentally incompatible with rotary union design principles.
This is the most frequent error we see in the field. It looks neat, it’s cheaper, and it feels sturdy. But for a rotary union, it is a death sentence.
The Physics of the Failure: Side Loading
A rotary union is designed to handle rotation and internal pressure. It does not handle external structural loads.
When you hard-pipe the supply line directly to the union’s housing:
-
Vibration Transfer: Every vibration from the machine frame travels directly through the rigid pipe into the union.
-
Thermal Expansion: As pipes heat up, they expand. A rigid pipe has nowhere to go, so it pushes or pulls against the union.
-
The Lever Effect: The pipe acts as a long lever arm. Even a tiny misalignment at the far end of the pipe translates into massive side loading (lateral force) on the union’s internal bearings.
The Result: This side load forces the rotary joint off-center. The internal bearings wear unevenly, the shaft tilts, and the mechanical seal faces—which need to be perfectly flat to seal—are forced open. The result is rapid, catastrophic leakage.
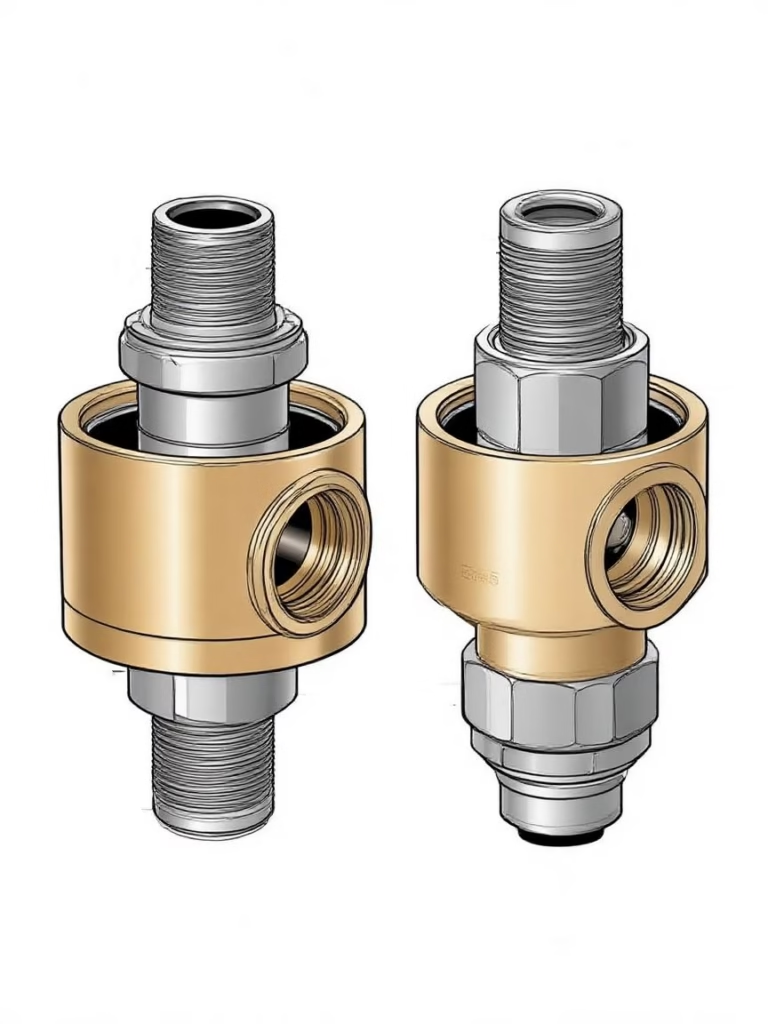
The Solution: Flexible Hose Connections
To prevent this, you must isolate the rotary union from the rigid piping system.
The Right Way: Always use a flexible hydraulic hose (SAE spec) to connect the supply line to the rotary union.
-
The Curve Rule: The hose should be installed with a gentle curve. It should never be pulled tight (tension) or twisted (torsion).
-
The Function: The flexible hose acts as a shock absorber. It “floats,” absorbing vibration, thermal expansion, and minor misalignments, ensuring that the union remains perfectly centered on the machine shaft.
Mistake #2: Ignoring Concentricity and Run-out
A rotary union is an extension of your machine’s shaft. It must be installed concentrically with the rotating shaft. If your machine shaft is wobbling, the union will wobble with it.
Understanding Run-out: Run-out refers to how much the shaft deviates from a perfect circle as it rotates. If the machine shaft is bent or if the adapter threads are cut poorly, the rotary union will experience a “camming” action.
Imagine holding a pencil attached to a drill. If the pencil is crooked, the tip whips around in a circle. Inside a rotary union, this whipping motion forces the internal seals to open and close thousands of times per minute. The springs eventually fatigue, or the carbon seal faces crack.
Consequences of Misalignment
Misalignment introduces constant radial loading, causing:
-
Uneven seal face wear
-
Localized heat generation
-
Loss of sealing pressure
-
Premature mechanical seal failure
Even small alignment errors can significantly reduce the service life of high-speed rotary unions.
Correct Installation Practice
-
Clean the Interface: Ensure the machine shaft face and threads are clean and free from debris. A single metal chip can throw off the alignment.
-
Measure with a Dial Indicator: Mount a magnetic dial indicator on the machine and measure the Total Indicator Reading (TIR) of the pilot or shaft.
-
The Limit: generally, the run-out should not exceed 0.002 inches (0.05 mm). If it does, you must fix the machine shaft or use a specific rotary union designed for high run-out (floating mount).
Mistake #3: Improper Torque Restraint (Locking it Down)
Most rotary unions use their own internal bearings for support. They have a housing that remains stationary while the shaft rotates. To keep the housing from spinning, you need a torque restraint (often called an anti-rotation device).
The Mistake: Many installers see the anti-rotation lugs on the housing and think, “I need to bolt this down tight so it doesn’t move.” They use a rigid bolt or clamp to fix the housing to the machine frame.
Why this fails: By bolting the housing rigidly, you are fighting the internal bearings. As the union rotates, it naturally wants to find its own center. If you bolt it down, you force it into a fixed position. If that position is even 0.001″ off from the shaft’s center, you create massive binding forces.
The Correct Method:
-
Allow it to “Float”: The torque restraint should prevent rotation, but allow for slight radial and axial movement.
-
Use a Fork/Rod Assembly: Insert a metal rod into the anti-rotation lug, and let that rod rest loosely in a U-shaped fork on the machine frame. There should be a small gap (clearance).
-
Flexible Cable: Alternatively, use a flexible cable to tether the housing.
-
Pro Tip: Never use the flexible hose itself as the anti-rotation device. This puts stress on the hose crimps and causes hose failure.
Mistake #4: Dry Start-Up (The Friction Burn)
We often see returns where the seal faces are “heat checked”—covered in fine radial cracks that look like a shattered windshield. This is the signature of dry running.
The Scenario: A technician installs a new union on a Friday. They turn on the motor to test the rotation. The machine spins at 2,000 RPM for 30 seconds. Then, they turn on the coolant or hydraulic pump.
- The Problem: In those 30 seconds, the union ran dry. Without fluid to lubricate the mechanical seal faces, friction generated extreme heat. When the cold fluid finally hit the hot seals… Crack. Thermal shock destroyed the seal before the machine even started production.
- The Prevention: Always verify that the fluid supply is ON and flowing through the union before starting the rotation. For high-speed applications, consider installing an interlock that prevents the motor from starting unless fluid pressure is detected.
Mistake #5: Using Thread Tape Incorrectly
Teflon tape (PTFE tape) is a staple in every toolbox, but it can be dangerous for hydraulic rotary unions.
The Danger
If tape is applied too close to the end of the threads, small shreds of tape can shear off during tightening. These shreds enter the fluid stream.
- They travel into the union.
- They get wedged between the seal faces.
- The faces separate, and the union leaks immediately.
The Best Practice of Rotary Union Installation
1. Liquid Sealant
Ideally, we recommend using an anaerobic liquid thread sealant (such as Loctite 542) designed specifically for high-pressure hydraulic fittings. Unlike PTFE tape, liquid sealants cure only when confined between metal threads, creating a solid, vibration-proof seal that will not shred or disintegrate. This eliminates the risk of solid debris entering the rotary union, ensuring that the delicate mechanical seal faces remain free from contamination. Furthermore, liquid sealants lubricate the threads during assembly, allowing for precise torque application without the bulk associated with tape.
2. The “Two-Thread” Rule
If you must use PTFE tape due to availability or specific application requirements, strict application discipline is non-negotiable. Always wrap the tape starting from the third thread back, leaving the first two leading threads of the male fitting completely bare. This safety buffer ensures that when the fitting is tightened, the leading edge of the tape is not sheared off and pushed into the fluid stream. By following this rule, you prevent loose tape fragments from migrating into the union and lodging between the seal faces, a common cause of immediate leakage.
The Golden Rules: A Quick Installation Checklist
Before you sign off on that installation job, run through this 5-point checklist to ensure maximum seal life:
1. Flexible Connection: Am I using a flexible SAE hydraulic hose, not a hard pipe?
Rigid metal piping acts like a lever arm, transferring every vibration and thermal expansion movement directly into the rotary union. This force creates excessive side loading, which grinds down the internal bearings and forces the seal faces out of alignment. By switching to a flexible SAE hydraulic hose, you isolate the union from the piping system, allowing it to function without external stress. This single change is the most effective way to prevent premature mechanical seal failure.
2. No Tension: Is the hose installed with a gentle curve, free of tension or twisting?
Simply installing a hose is not enough; the geometry of the installation is critical. The hose must be installed with a gentle “S” curve or loop, ensuring it is never pulled taut or installed with a twist. If the hose is under tension, it transmits stress back to the housing just like a hard pipe would, defeating the purpose of the flexible connection. Ensure there is enough slack to allow the hose to “breathe” and absorb vibration without kinking.
3. Alignment: Is the machine shaft run-out less than 0.002″?
The rotary union is an extension of your equipment; if the machine shaft wobbles, the union will wobble with it. Excessive shaft run-out creates a “camming” action that forces the internal seals to open and close rapidly, leading to fatigue and leakage. Before installation, use a dial indicator to verify that the concentricity is within the manufacturer’s tolerance, typically under 0.002 inches (0.05 mm). Correcting alignment issues at the source is essential for maintaining a stable fluid film between the seal faces.
4. Anti-Rotation: Is the housing “floating” (restrained loosely), not bolted down rigidly?
The housing of a bearing-supported union must be prevented from spinning, but it should never be bolted down rigidly to the machine frame. Rigid mounting fights against the union’s internal self-alignment and can bind the bearings, leading to overheating and seizure. Instead, use a torque restraint method that allows the housing to “float,” such as a loose fork-and-rod assembly or a flexible cable tether. This clearance allows the unit to compensate for minor misalignments during operation.
5. Fluid First: Is the fluid supply turned on before the rotation starts?
Rotary union seals rely on the fluid media—whether water, oil, or coolant—to provide lubrication and dissipate heat. Starting the rotation without fluid causes dry running, which generates immense friction heat capable of cracking ceramic seal faces in seconds. To prevent this thermal shock, always ensure the supply pump is active and fluid is flowing through the union before the machine starts rotating. Installing a flow switch interlock is the best way to automate this protection.
Frequently Asked Questions (FAQ) of Rotary Union Installation
Q: Can I use a rotary union with a bent shaft if I use a flexible hose?
A: A flexible hose helps, but it cannot cure a severely bent shaft. If the run-out is excessive (>0.005″), the internal wobble will still destroy the union’s bearings. You must repair the machine shaft or use a specialized “wobble-tolerant” union.
Q: How tight should I tighten the hose connection?
A: Follow the standard torque specifications for the fitting type (NPT, BSP, or SAE). Do not overtighten. Overtightening can distort the union housing, causing the internal seals to bind.
Q: Why does my rotary union vibrate?
A: Vibration usually indicates misalignment or that the hose is too tight (transmitting machine vibration). It could also mean the internal bearings are already worn out.
Conclusion: Prevention is Cheaper than Repair
A rotary union is a small component with a big responsibility. When installed correctly, it is an invisible hero, keeping your hydraulics powering and your coolants flowing. When installed poorly, it becomes a recurring nightmare of downtime and oil spills.
By avoiding the “Hard Piping” trap and following these simple installation protocols, you can virtually eliminate “infant mortality” failures in your rotary joints.
Need help with a difficult installation? At Dann, we don’t just sell parts; we engineer solutions. If you are struggling with repeated seal failures, contact our technical team for a free application review. We can help you select the right rotary union and design the perfect installation setup.