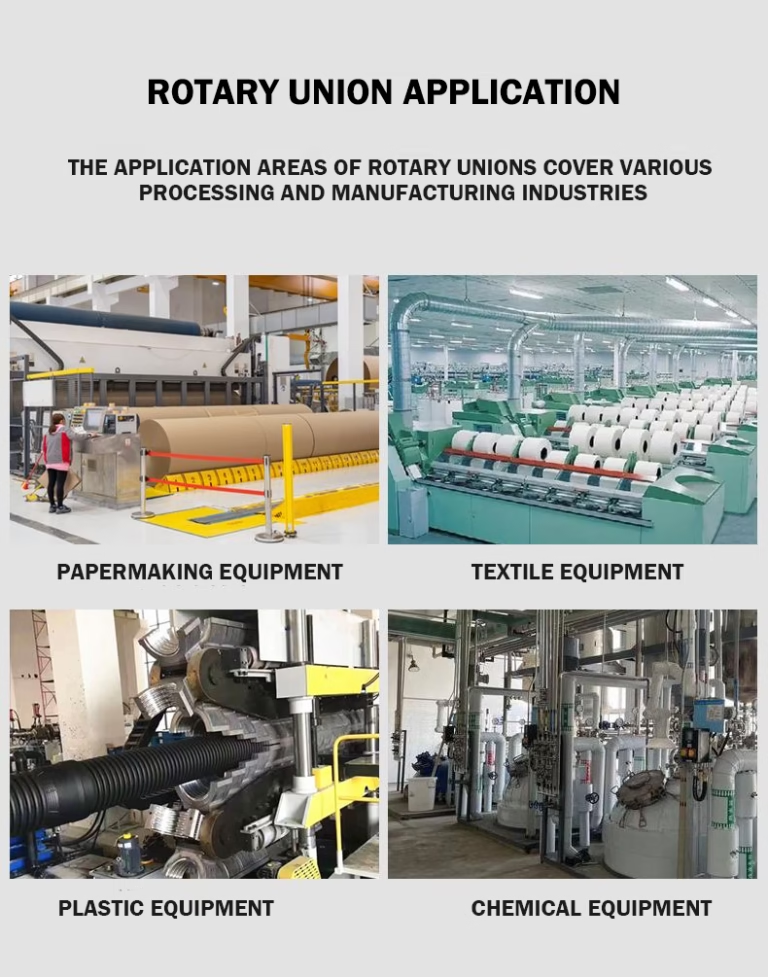

How to Troubleshoot Hydraulic Rotary Union Leaks: A Comprehensive Guide
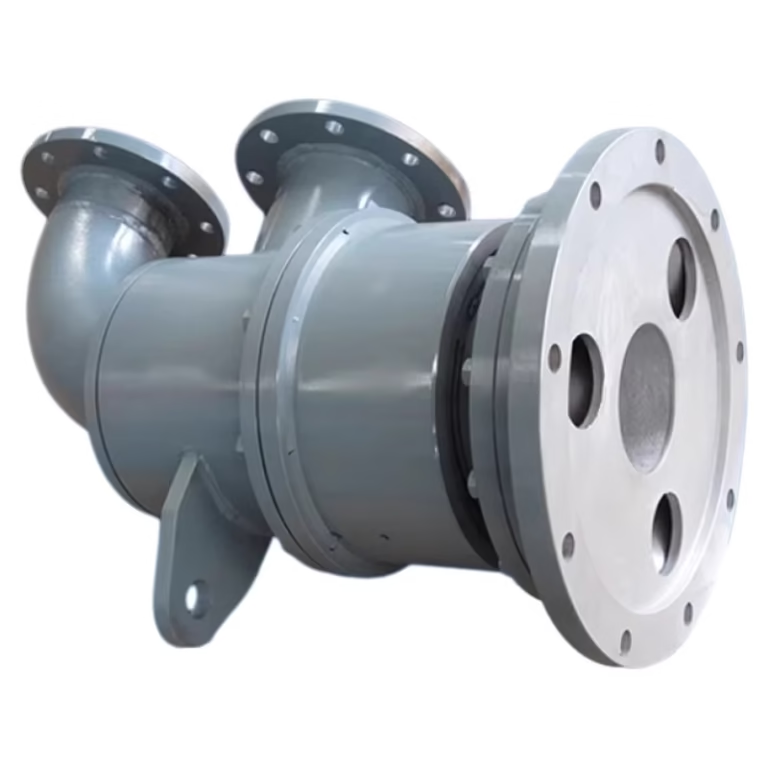
In any sophisticated hydraulic system, the steady, rhythmic hum of operation is the sound of productivity. That is, until it’s interrupted by the tell-tale drip…drip…drip of a hydraulic fluid leak. One of the most common, yet critical, sources of such a problem is the rotary union. Hydraulic rotary union leaks are more than just a messy inconvenience; they are a direct threat to operational efficiency, safety, and your bottom line, leading to costly downtime, environmental concerns, and potential damage to downstream components.
For the engineer who designed the system, the technician responsible for maintaining it, and the purchasing manager who sourced the component, understanding how to systematically troubleshoot a hydraulic swivel joint leaking is an invaluable skill. This is not about guesswork or randomly tightening fittings. It’s about a methodical process of observation, analysis, and corrective action.
The integrity of these unions is paramount to operational efficiency and safety. Leakage presents multifaceted challenges: immediate production halts due to system depressurization, escalating maintenance costs from component replacement and cleanup operations, and environmental contamination risks from spilled hydraulic fluids infiltrating ecosystems. Beyond these direct consequences, chronic leakage can accelerate equipment degradation through lubricant loss and corrosion, creating cascading failure risks in interconnected mechanical systems.
The hydraulic system is a transmission system widely used in modern industry. It has the advantages of high power, fast response, and high precision. However, various faults may occur in the hydraulic system during use, among which leakage is the most common. Leakage will not only lead to a variety of faults, such as decreased system efficiency, low working pressure, and slow movement speed, but also pollute the working environment and waste resources. So, how to eliminate the leakage of the hydraulic system? The following are some steps and precautions for eliminating the leakage of the hydraulic system.
This comprehensive guide will provide you with a step-by-step framework to accurately diagnose the root cause of hydraulic rotary union leaks, implement effective repairs, and most importantly, establish strategies to prevent them from happening in the first place.
Safety First: Pre-Troubleshooting Checklist
Before a single tool is touched, safety is the absolute priority. Hydraulic systems store energy under immense pressure, and fluid can be extremely hot. Failure to follow safety protocols can result in severe injury.
- Lockout/Tagout (LOTO): Ensure the machine is completely de-energized and cannot be accidentally started. Follow your facility’s established LOTO procedures.
- Depressurize the System: Safely relieve all hydraulic pressure from the circuit connected to the rotary union. Verify with a pressure gauge that the system is at 0 PSI/Bar.
- Personal Protective Equipment (PPE): Always wear safety glasses with side shields and appropriate chemical-resistant gloves. If fluid is hot, additional thermal protection is required.
- Containment: Place drip trays or absorbent materials under the work area to contain any spills.
Step 1: Identify the Source of the Leak
Diagnosing a leak requires a systematic approach. Start by visually inspecting the union and surrounding areas for:
Visible Fluid Residue: Look for oil stains, puddles, or buildup.
Unusual Noises: Hissing or clicking sounds may indicate pressure loss.
Temperature Changes: Overheating could signal friction from worn seals.
Tools for Diagnosis:
Pressure Gauge: Measure system pressure to identify drops.
UV Dye and Blacklight: Pinpoint leaks in hard-to-reach areas.
Thermal Imaging Camera: Detect temperature irregularities.
Step 2: Common Causes of Hydraulic Rotary Union Leaks
Leaks often stem from preventable issues. Here’s a breakdown of typical causes:
A. Seal Wear and Degradation
The seals are an important part of the hydraulic system. They can keep the hydraulic oil clean and sealed. If the seals are of poor quality or improperly assembled, leakage will occur. Therefore, the quality and assembly of the seals should be checked first to ensure that they are intact and installed correctly.
Lip Seals: Prone to abrasion from contaminants.
O-rings: Degrade over time due to heat or chemical exposure.
Mechanical Face Seals: Require precise alignment to avoid friction.
Over time, seals can harden, crack, or lose elasticity due to exposure to high temperatures, pressures, or incompatible fluids. For instance, elastomeric seals may deteriorate in high-temperature applications, while metallic seals may wear out under excessive vibration.
B. Misalignment or Loose Fittings
Check whether the size and design of the sealing part are correct, the processing accuracy is good, and the assembly is correct. Incorrect size design of the sealing part, poor processing accuracy, and poor assembly will cause hydraulic system leakage. Therefore, it is necessary to check whether the size design of the sealing part is correct, the processing accuracy is good, and the assembly is correct to avoid internal and external leakage.
Improper installation can strain seals or cause fittings to loosen. Always torque bolts to the manufacturer’s specifications.
The interface between the rotor and stator experiences friction, leading to wear on both components. This wear can create gaps where fluid can escape, especially in high-speed applications.
Misalignment during installation can cause uneven pressure on seals, leading to premature failure. Additionally, over-tightening or under-tightening fasteners can compromise seal integrity.
C. Contaminated Fluid
Particles in hydraulic fluid scratch seals and corrode metal surfaces. Regular filtration is essential.
Particulates in the hydraulic fluid can act as abrasives, damaging seals and surfaces. Water ingress can also corrode metal parts and degrade oil viscosity.
D. Excessive Pressure or Temperature
Another important reason for hydraulic system leakage is that the system operating pressure is too high. Excessive system operating pressure will cause the seal to fail, causing the hydraulic oil to leak. Therefore, it is necessary to check whether the system operating pressure is too high and ensure that it does not exceed the sealing pressure range of the seal.
Overloading the system beyond its rated capacity accelerates wear. Check pressure relief valves and cooling systems.
In some cases, the rotary union’s design may not adequately address the specific application’s demands, such as insufficient cooling channels for high-temperature fluids or inadequate seal redundancy.
E. Environmental Factors
Moisture, dust, or corrosive chemicals can compromise seals. Consider shield upgrades for harsh conditions.
In short, it is necessary to start from multiple aspects to eliminate the leakage of the hydraulic system, from seals to relative motion pairs, oil temperature, system operating pressure, etc., and they must be checked and monitored. At the same time, it is also necessary to pay attention to the correct use and maintenance to avoid leakage caused by incorrect use and maintenance. Only comprehensive inspection and maintenance can effectively eliminate the leakage of the hydraulic system.
Step 3: Repairing Hydraulic Rotary Union Leaks
Once the cause is identified, implement targeted repairs:
A. Seal Replacement
Disassemble the Union: Follow the manufacturer’s manual.
Clean the Components: Remove debris and old seal residues.
Install New Seals: Use compatible replacements (e.g., Viton for high heat).
Reassemble and Test: Pressurize the system to check for leaks.
B. Component Replacement
If the shaft or housing is damaged, replace the entire union. Upgrading to corrosion-resistant materials (e.g., stainless steel) may prevent future issues.
C. Alignment Adjustment
Use laser alignment tools to ensure the shaft and housing are perfectly aligned.
D. Fluid System Flush
If contamination is the root cause, flush the system with a compatible cleaner and replace the fluid.
Step 4: Preventive Maintenance Strategies
Proactive care reduces downtime and extends the union’s lifespan.
A. Regular Inspections
Schedule quarterly checks for leaks, corrosion, and wear.
B. Lubrication Best Practices
Apply manufacturer-recommended lubricants to seals to minimize friction.
C. Fluid Quality Monitoring
Test the fluid regularly for contaminants and replace filters as needed.
D. Operate Within Specifications
Avoid overloading the system to prevent premature wear.
E. Training for Maintenance Teams
Ensure staff recognize early leak signs and follow proper repair protocols.
Summary: Prevention is better than repair
3 Golden Rules:
Regular monitoring: Check the hardness of seals, bearing clearance, and connecting bolt torque every quarter.
Environmental management: Control temperature fluctuations to<± 10 ° C, humidity to<70%, and dust concentration to<5 mg/m³.
Data archiving: Record the type of medium, peak pressure, and maintenance measures for each leak, and establish a fault prediction model.
| Symptom | Potential Root Cause(s) | Recommended Action(s) |
|---|---|---|
| Leak from Weep/Drain Port | 1. Normal end-of-life seal wear. 2. Abrasive wear (contaminated fluid). 3. Chemical degradation (wrong fluid). 4. Excessive pressure/speed/temp. | 1. Schedule seal kit replacement. 2. Analyze fluid sample for contamination; check filtration. 3. Verify fluid compatibility with seal material. 4. Check system operating parameters against union's specs. |
| Leak from Hose Fitting/Port | 1. Loose fitting. 2. Damaged O-ring or threads. 3. Cracked fitting. | 1. Tighten fitting to specified torque. 2. Depressurize, disconnect, inspect, and replace damaged seal/fitting. 3. Replace cracked fitting immediately. |
| Leak from Housing Body | 1. Catastrophic over-pressurization. 2. Severe side load or impact damage. 3. Material fatigue/defect. | 1. SHUT DOWN IMMEDIATELY. 2. Replace the entire rotary union. 3. Investigate system for cause of over-pressurization or impact. |
| Loud Grinding/Rough Rotation | 1. Bearing failure. 2. Severe internal contamination. | 1. The unit has failed. Replace the entire rotary union immediately to prevent seizure and further machine damage. |
Conclusion
Hydraulic rotary union leaks are a multifaceted challenge that demands a blend of technical expertise, meticulous maintenance, and proactive planning. By understanding the root causes, employing systematic diagnostics, and implementing targeted solutions, operators can minimize leaks and maximize equipment uptime. Remember, prevention is key—investing in training, quality components, and regular inspections will pay dividends in the long run.
Troubleshooting hydraulic rotary union leaks demands technical expertise and a structured approach. By combining regular inspections, timely repairs, and preventive measures, you can keep the machinery running efficiently and safely.
For further reading, check out our articles on Hydraulic System Efficiency Optimization and Common Rotary Union Failure Modes.
Stay tuned for more industrial maintenance insights—subscribe to our blog for updates!